

Working with Images
Jump to: Copyright Free Images | Resizing Images | Uploading Images | Featured Images | Slideshows
Copyright Free images
Whenever possible, it’s always good practice to take your own photos for an article, this way you avoid any potential issues that could arise with copyright. Whenever you go reporting or go to conduct an interview always try to ensure you have a camera (or in worse case scenario a phone with a camera) available. Alternatively, if you have shot video for the piece, why not export a selection of images from the video.
However, there will be plenty of cases where you need to find images, from an external source, to use in your Post – if this is the case, how do you make sure you are free to use these images? Just because an image is online, it doesn’t mean it is ok to use it.
Copyright Free Images: Wikimedia Commons
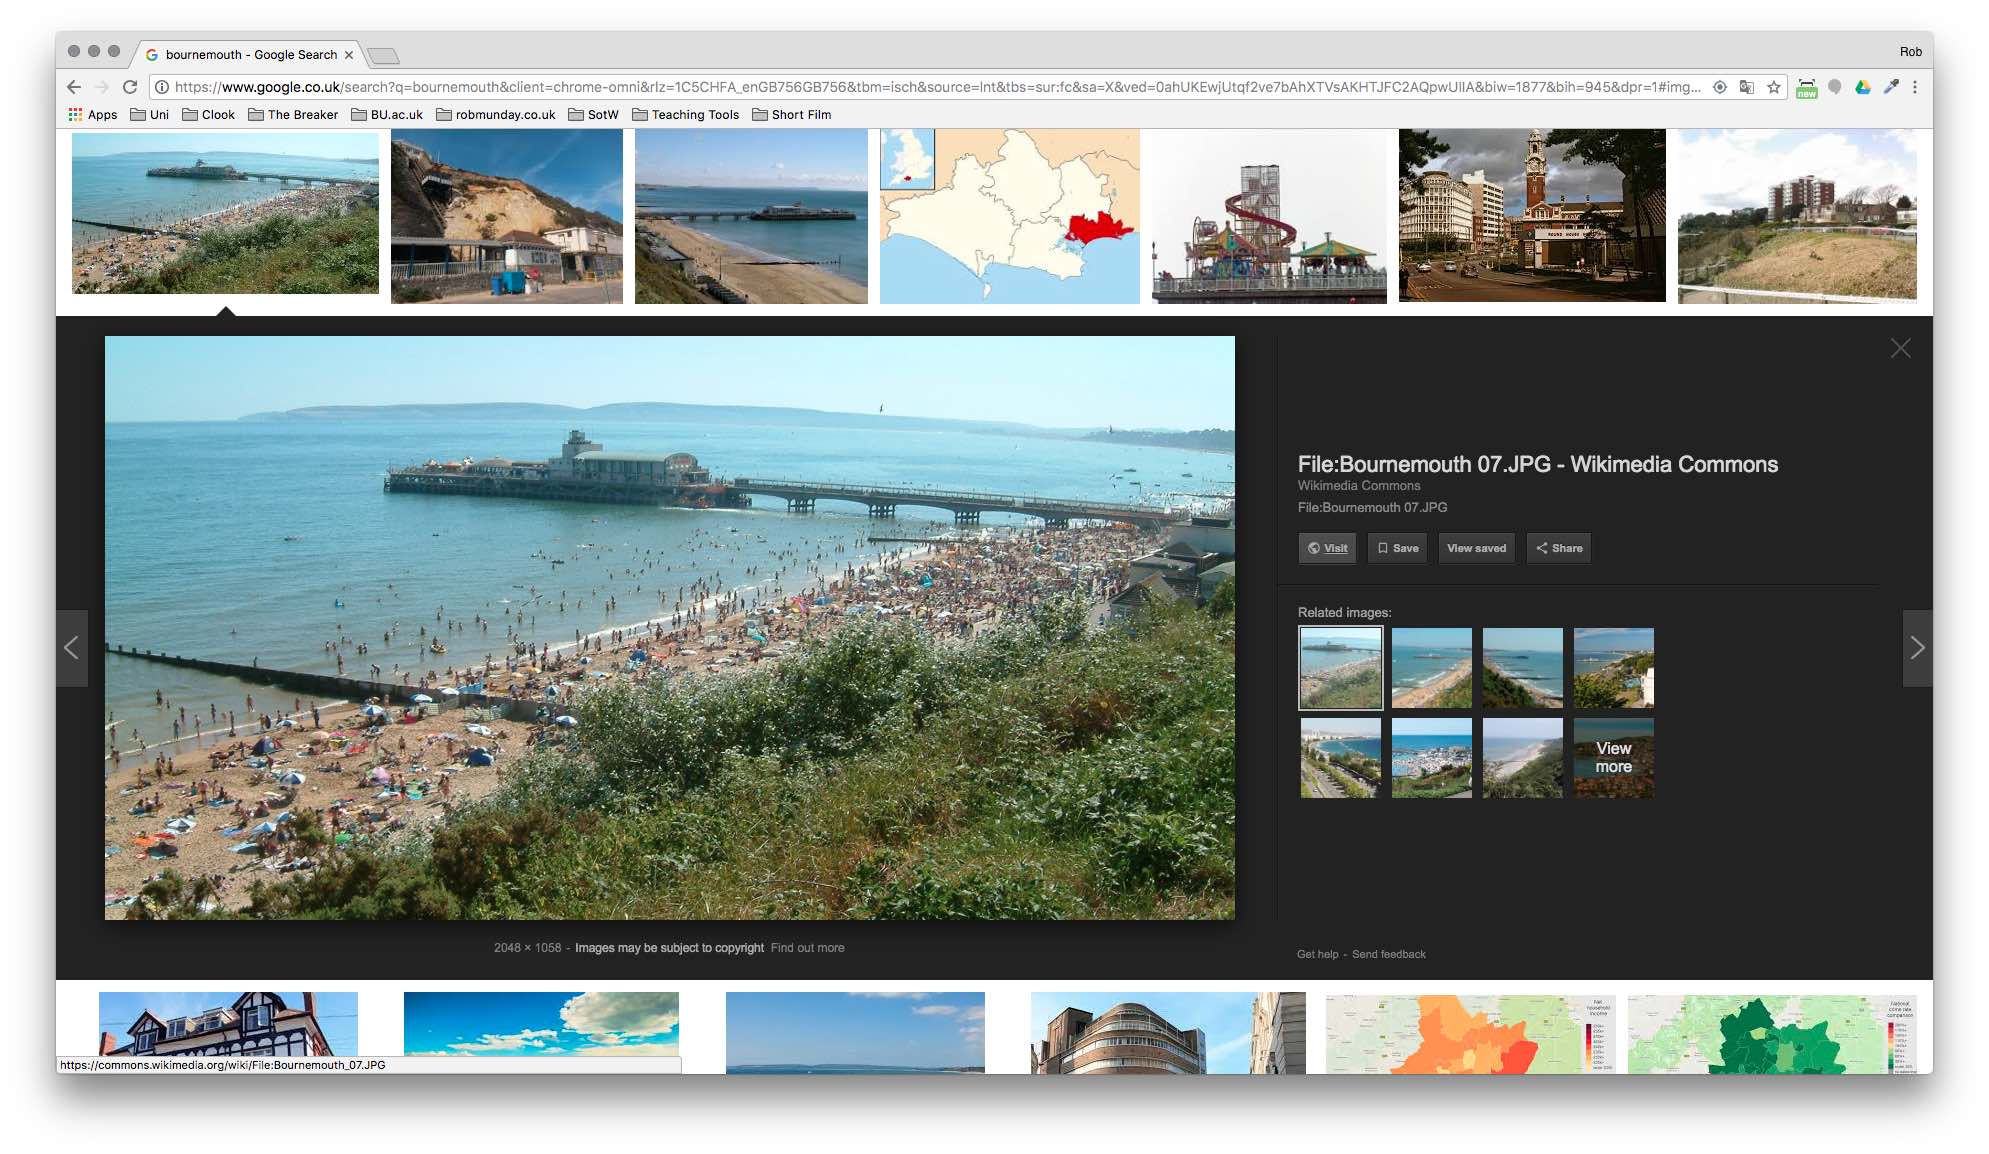
Wikimedia Commons is a media file repository making available public domain and freely-licensed educational media content (images, sound and video clips) to everyone.
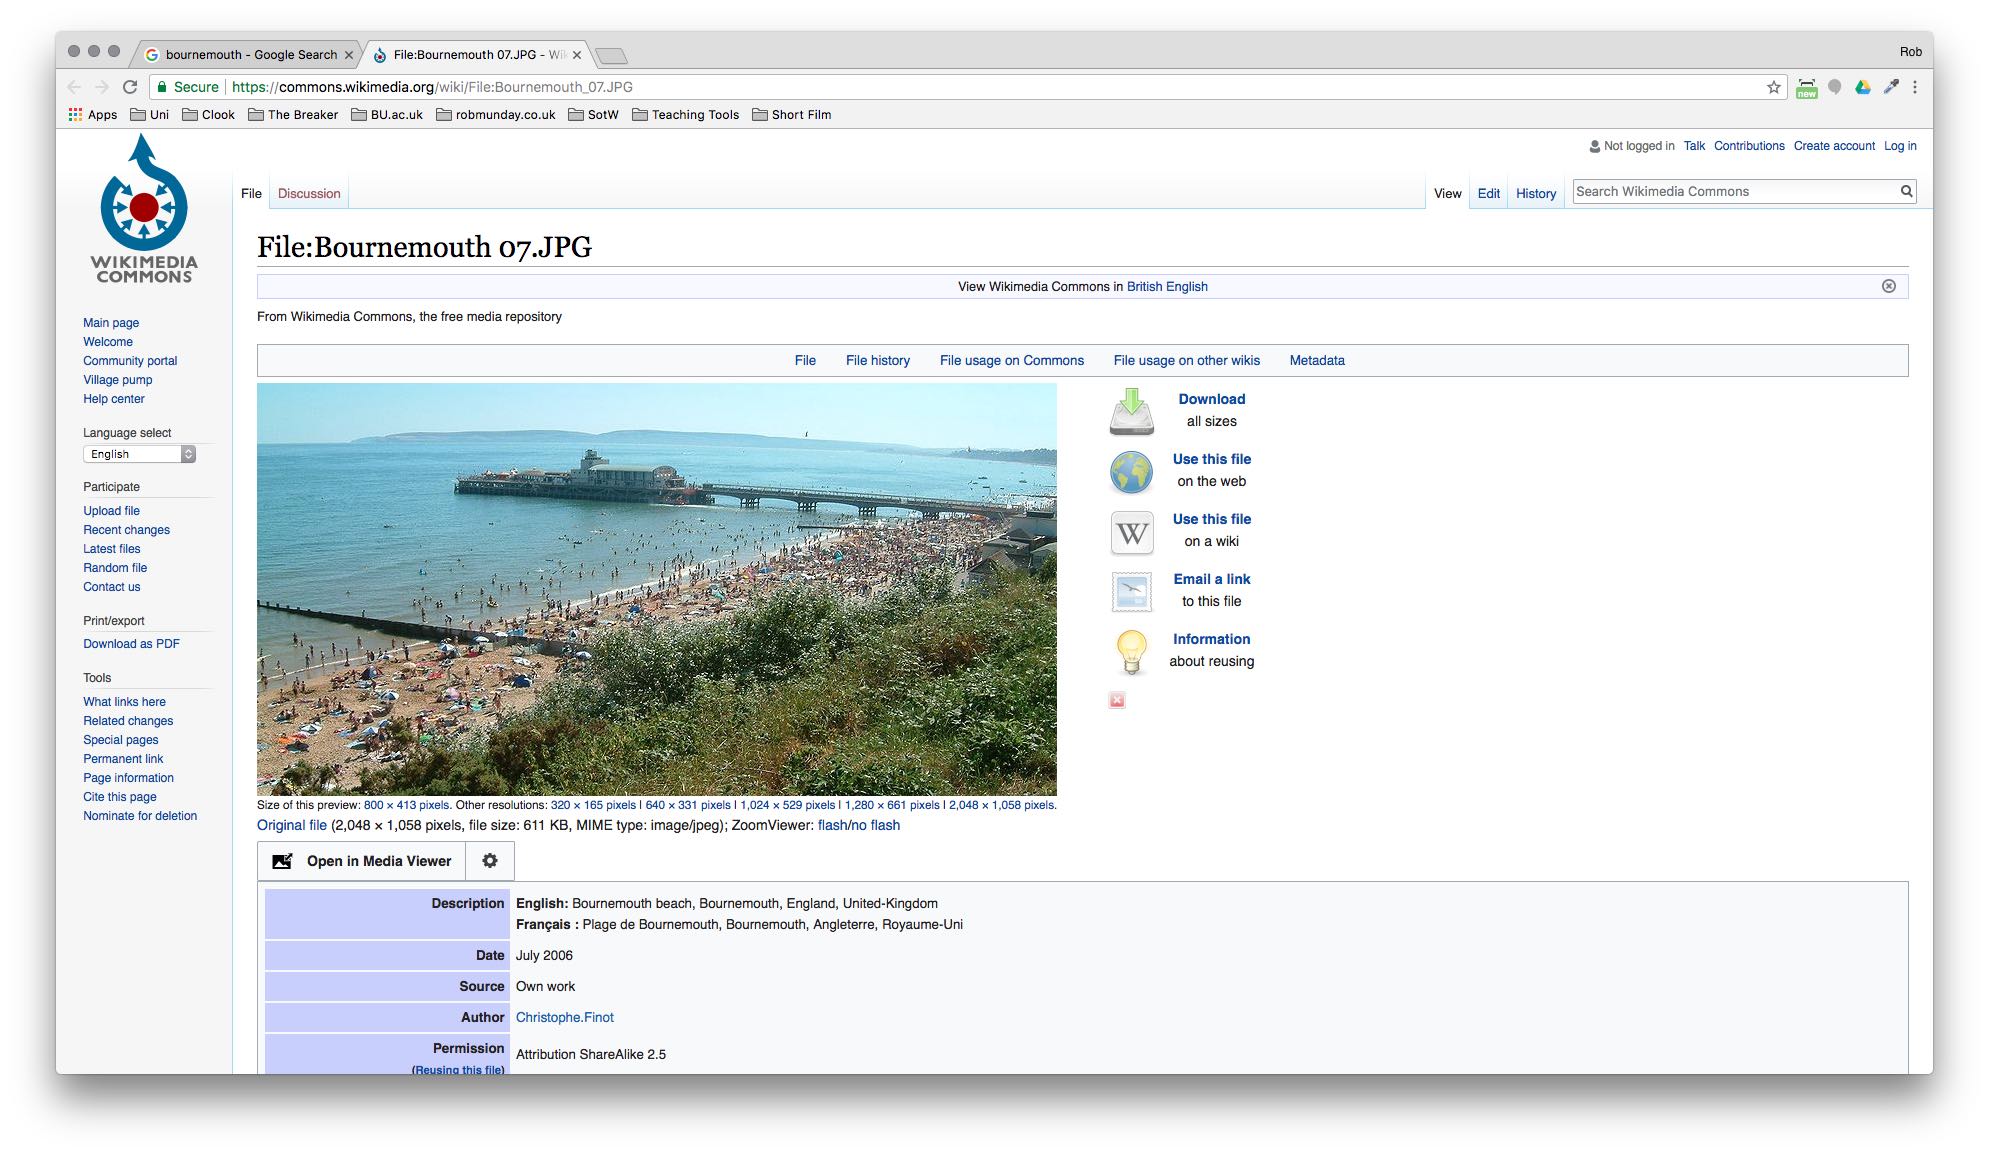
- To use Wikimedia Commons search the site by using search bar in the top right corner of the site.
- From the results, pick an image you would like to use in your article and click on it.
- On the new overlay window that opens, click on the ‘More Details’ button.
- Click on the ‘Download all sizes’ button to find attribution details and save the image.

- Copy the text contained in the ‘Attribution’ field, ensuring you click on the ‘HTML’ checkbox first.
- Click on one of the image sizes (remember you shouldn’t need an image larger than 2000px) and then right click on the image to save it to a destination of your choice (when saving the image try to give it a name that corresponds to the content).
More Copyright Free Image Sites: unsplash.com / pexels.com
Copyright Free Images: Attribution
Whichever site you source copyright free images from, you need to make sure you credit the original author appropriately
To find the appropriate credit for the image you want to use, in the Google search results click on the Visit button and go to the website where the image is hosted.
Some websites like Wikimedia will make it really easy for you find attribution.
To find an image credit on Wikimedia click on the ‘Use the File on the Web’ button.
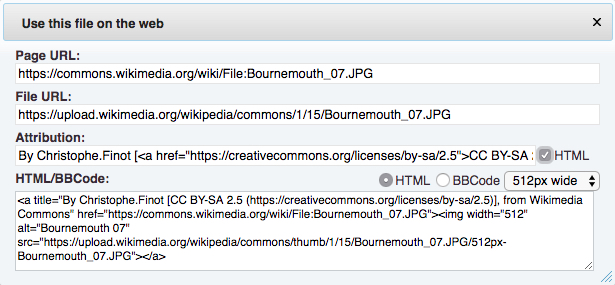
In the new dialogue window that appears, copy the text from the Attribution field – clicking on the HTML checkbox to make links in the credit are clickable.
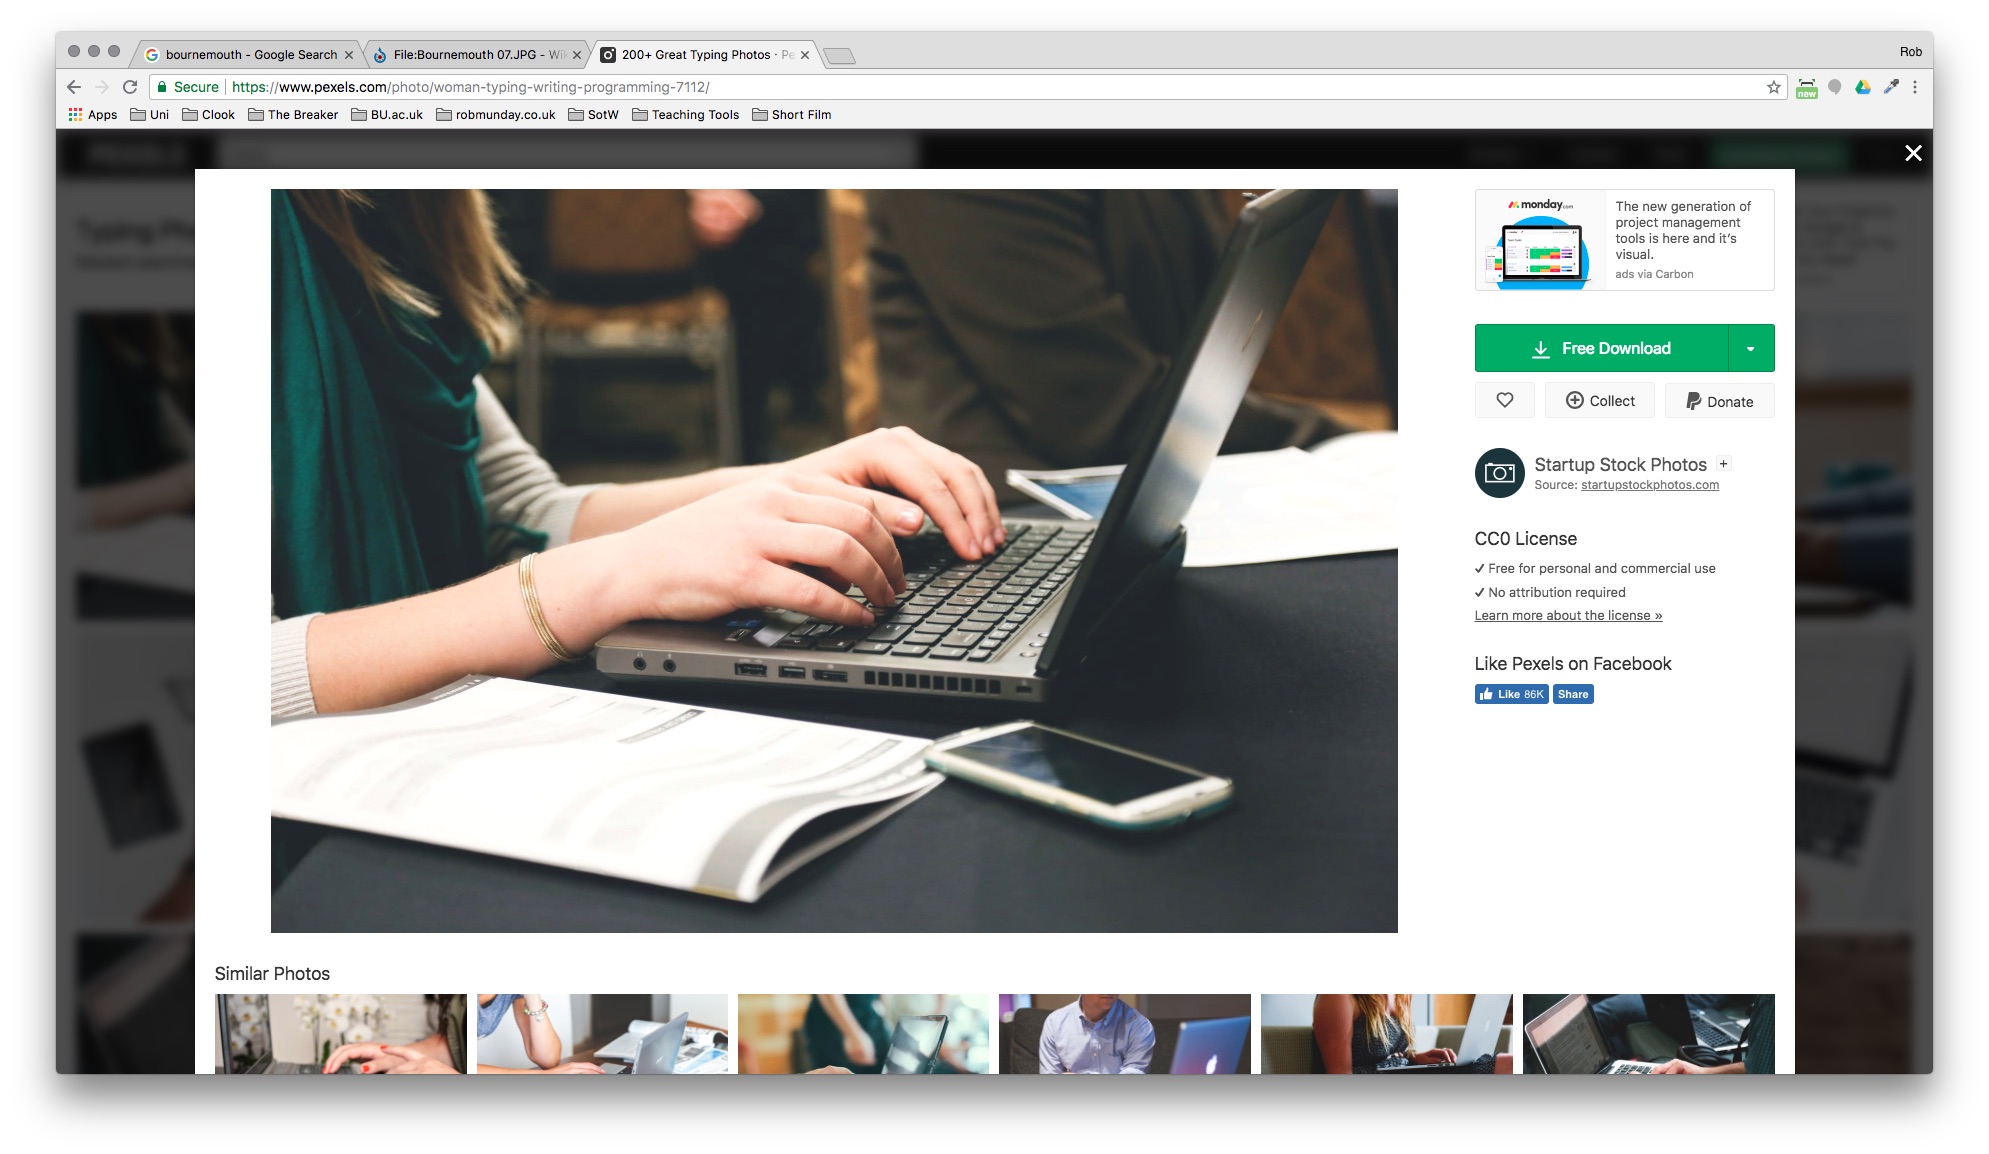
Other copyright free images, like this one on Pexels, state No attribution needed – so you can legally use it without crediting the original author. However as your work will be published for an academic assignment, please still provide credit by referencing the original author of the picture and the website you got it from.
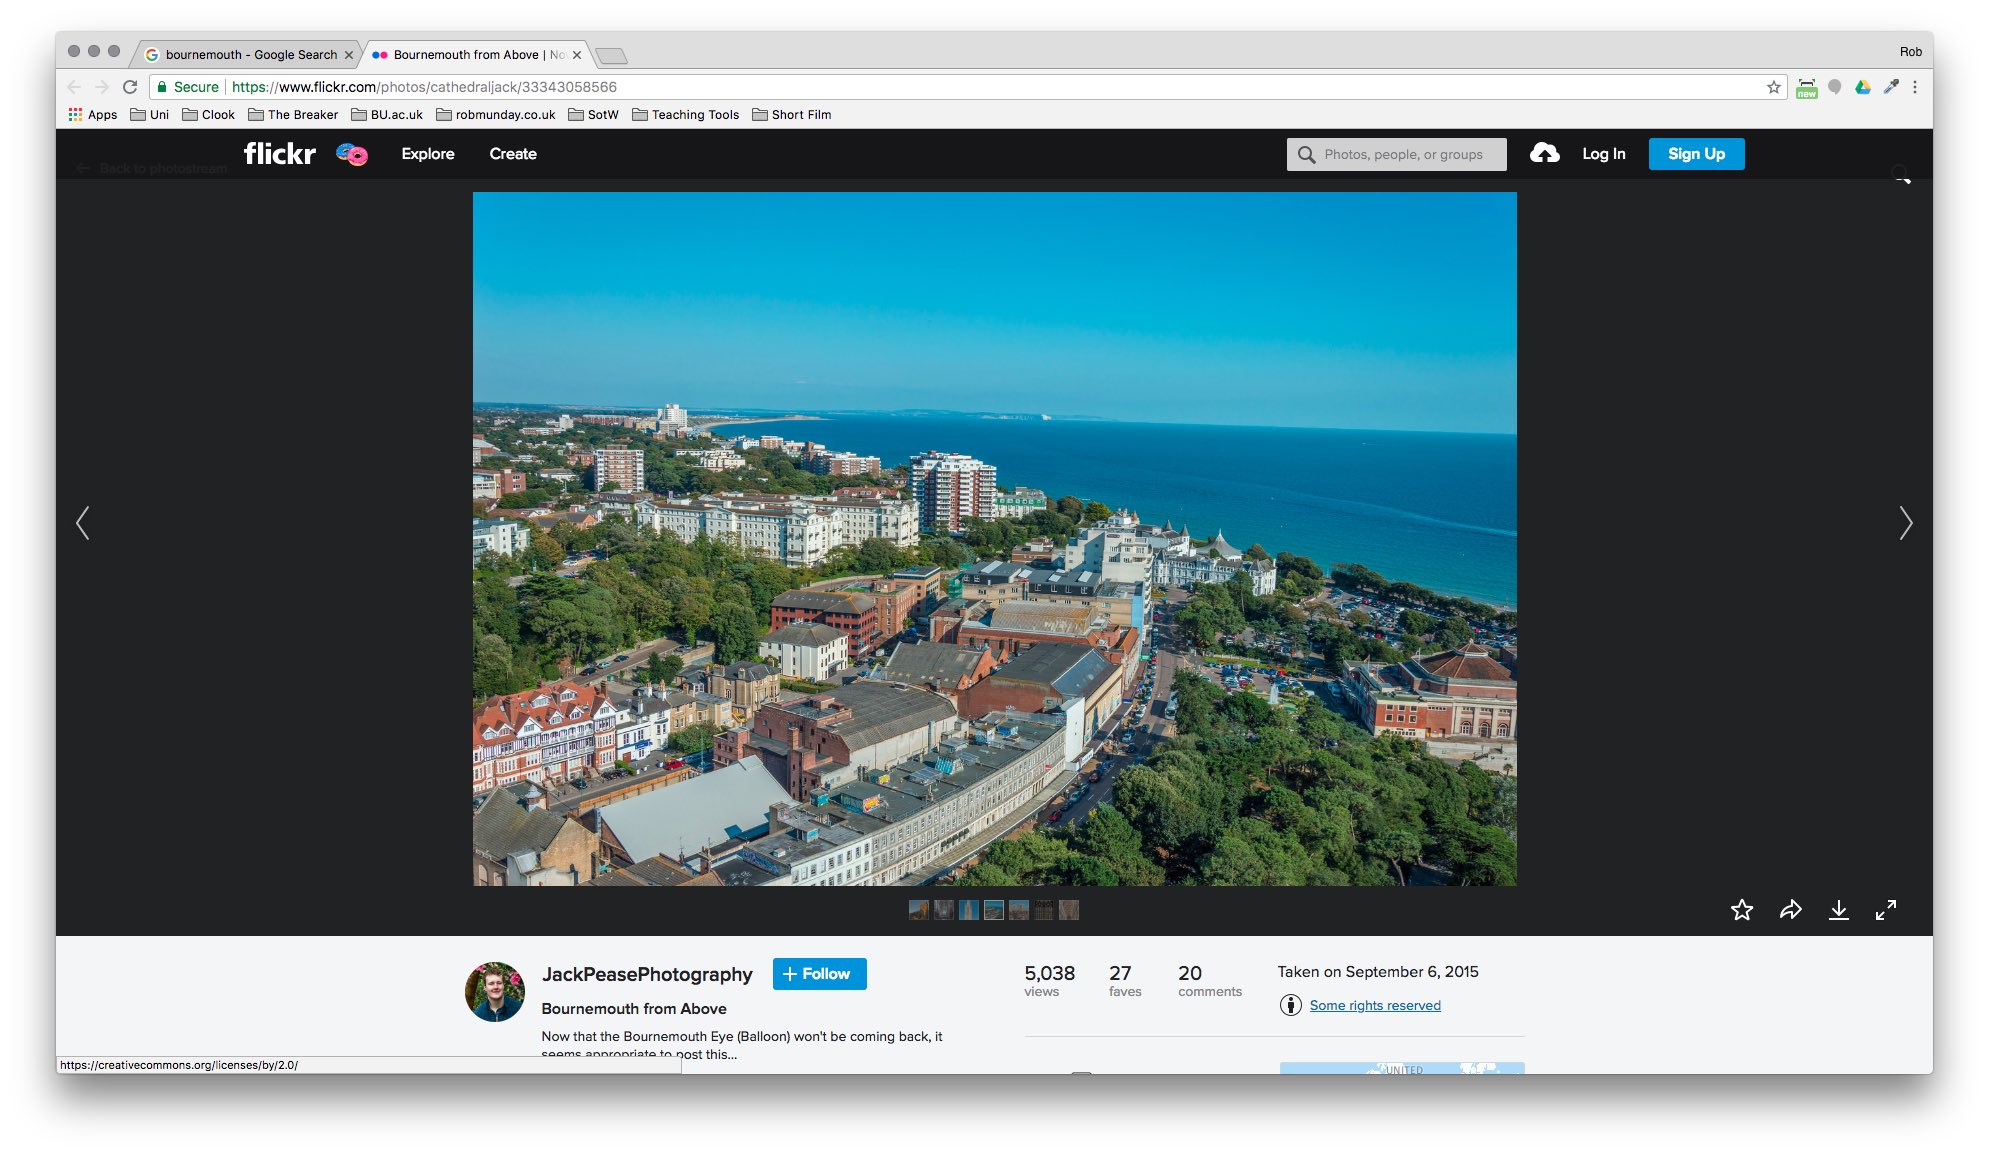
On some websites the image credit isn’t as easy to find. On this image on Flickr it has been uploaded with a license allowing you to use it, but you can only see that information by clicking on the ‘some rights reserved’ link.
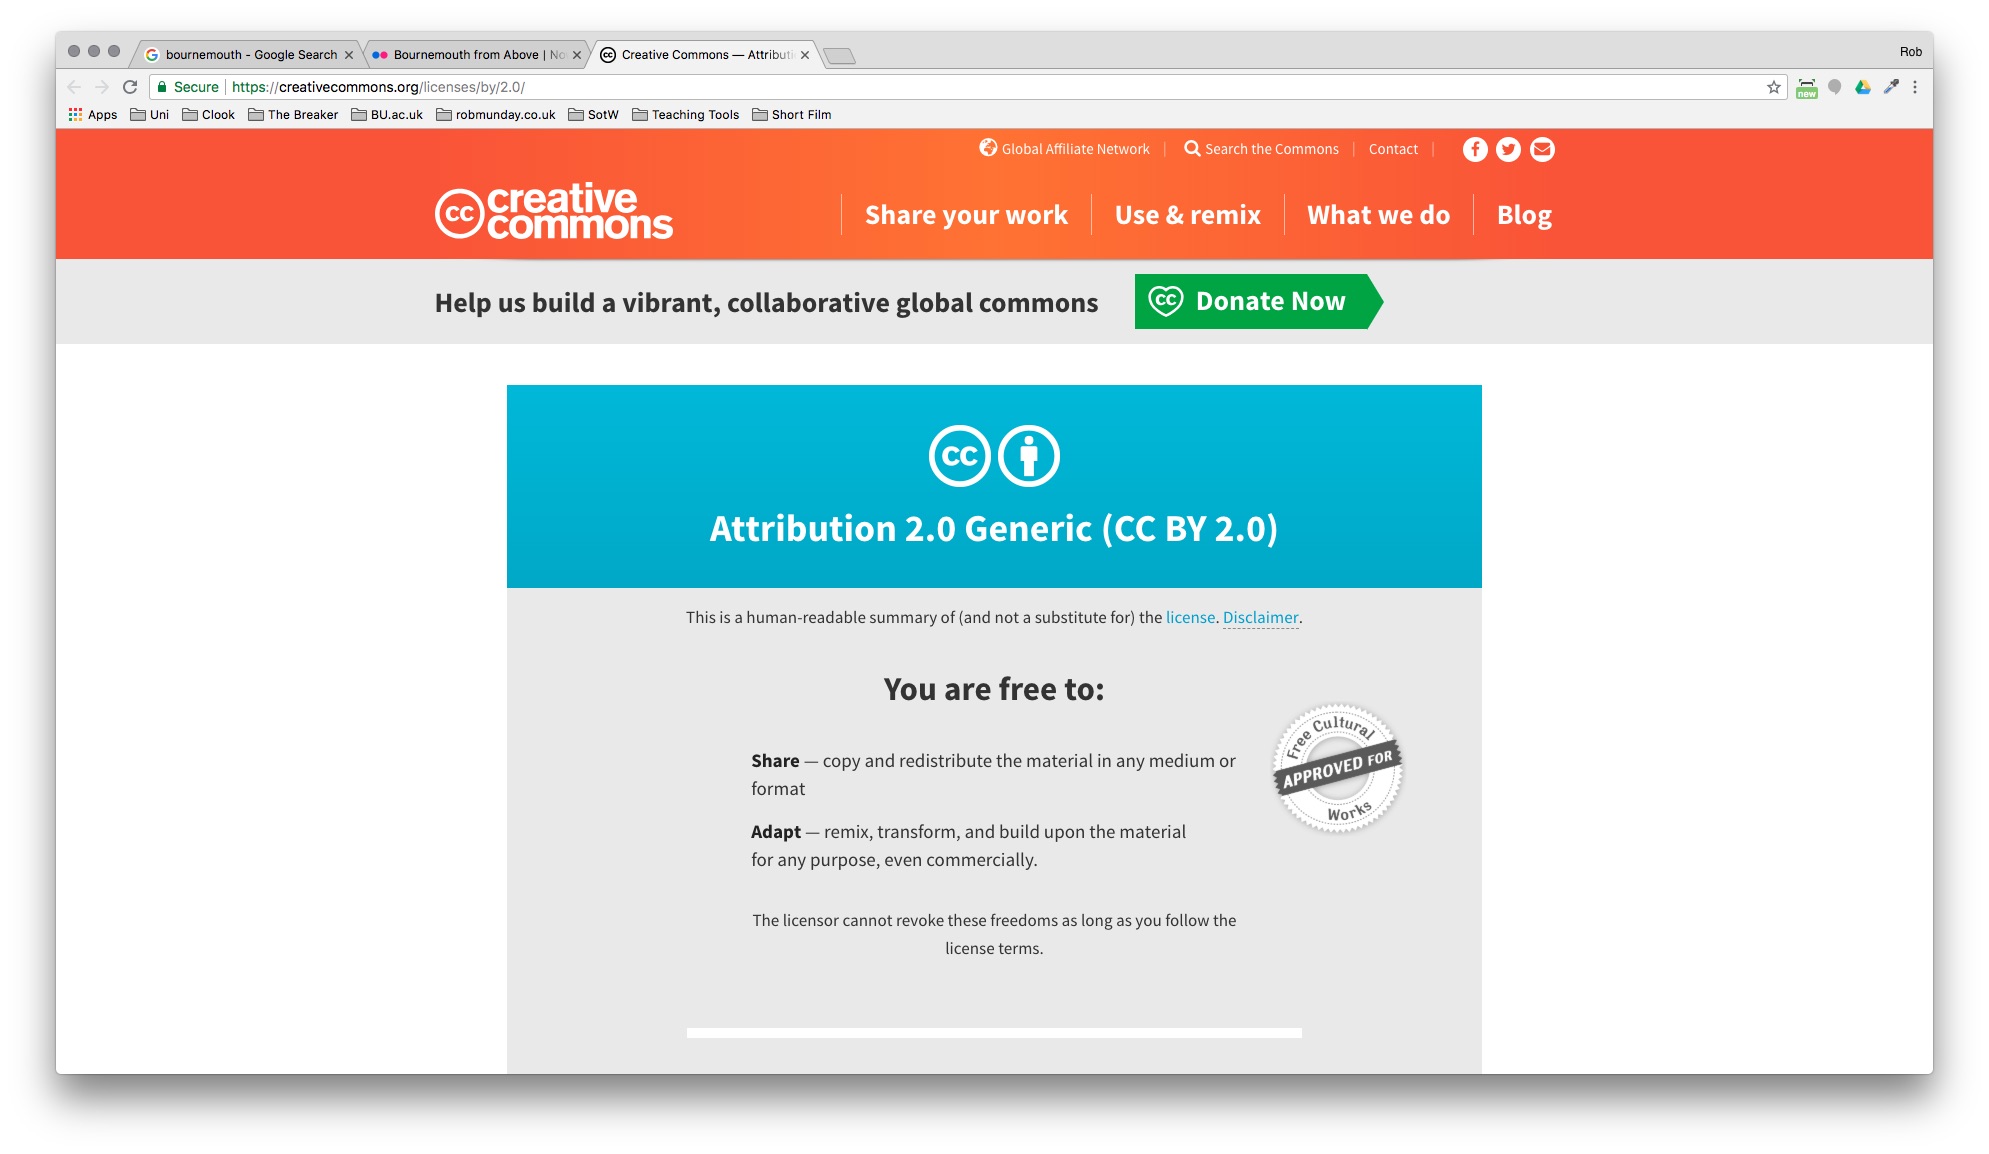
Clicking on the ‘some rights reserved’ link takes you to a page explaining the license (Creative Commons) of the image, but no text you can copy for a credit.
To add an acceptable credit for a Creative Commons license, copy the code here
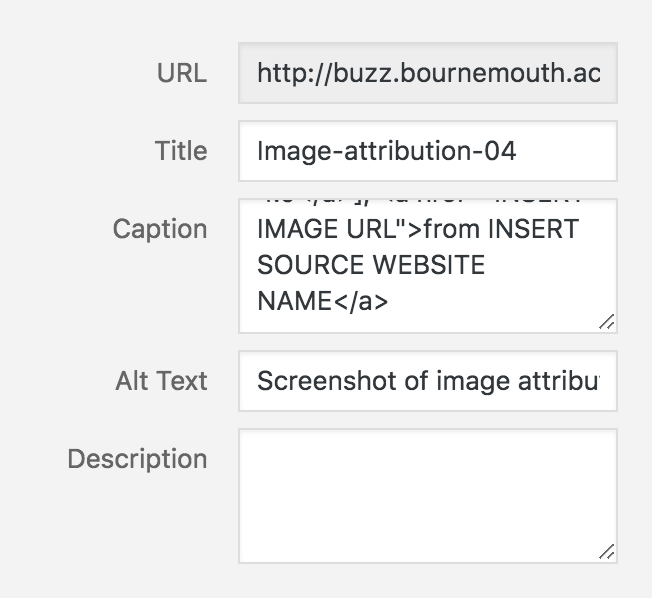
All image attribution should be pasted into the ‘Caption’ field when uploading images.
If it is a Featured image (see below) then the image attribution should also be pasted into caption and should display under the image within the article
Copyright Free Images: Attribution Examples
Wikimedia Commons

Pixabay (or other sites that say No Attribution Required)
Flickr (or other sites that say refer you to the Creative Commons license)
Resizing in Photoshop
There are many methods and tools you can use for resizing images for the web and whether you use an online tool such as Cropp.me or photo-editing software like Photoshop and Preview the output should be the same – an image that is reduced in pixel size and compressed to a file size suitable for online viewing. This guide to resizing images will show you the simplest way to prepare images for the web using Photoshop.
Please note: This method is different from the one used for resizing images for print.

First you need to locate your file in the Finder window (this guide is assuming you are using a Mac in uni) – as you can see the file size of the image we’re using is currently 19.7mb and the dimensions are 6016 x 4000 (pixels) – this is way too big for online.

From the Finder window you can open your image in Photoshop. Hold down the Ctrl key and click on the image (or right click if you have the option). From the pop-up menu choose the option Open with
From the selection of software that appears in the next pop-up menu, choose the latest version of Photoshop.

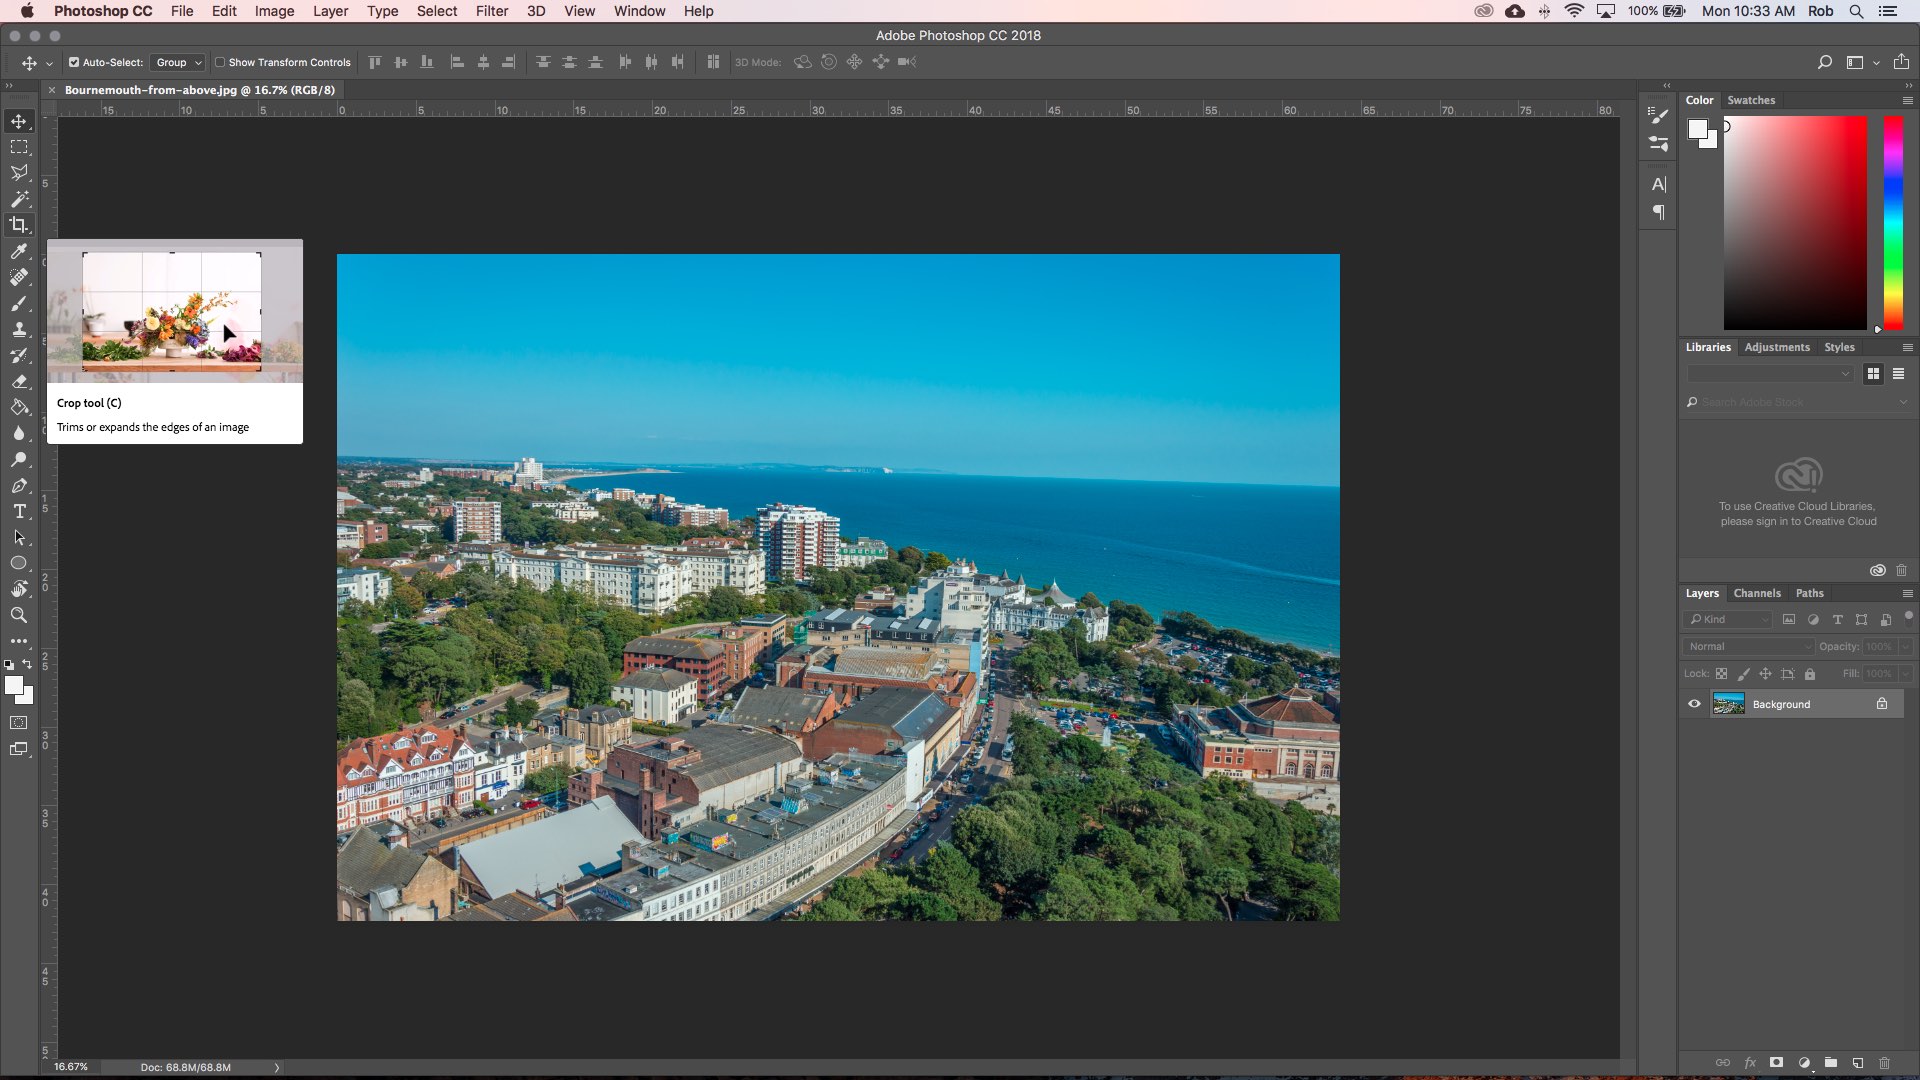
Now your image is open in Photoshop, go to the ‘File’ menu and select ‘Export’ > ‘Export As…’

In the new Export As window, select a Format from the drop-down menu (in the top-right corner). Unless my image includes a transparency (in which case I’ll save it as a PNG), I’ll always save it as a JPEG.
Underneath the Format dropdown there’s a quality slider, lower this to reduce file size – the estimated file size of the image can be seen on the left hand side of the window
To alter the dimensions of your image adjust the width or height fields in the Image size section – changing one should automatically change the other as not to alter the image’s aspect ratio. When working with images online we always work in pixels (or ‘px’) as the images will always be displayed on a screen.

As you can see from the adjacent screenshot, the Format is set to JPG, the quality has been reduced to 70% and the Image size has been changed so it has a width of 1000px.
on the left hand side of the window you can see these details confirmed and our new estimated file size is 286.8kb. I always try to compress my images to around 200/300kb, so this is now ready to be uploaded to The Breaker.
You can now click on the Export All… button and choose a destination and name for your image (do give some consideration to the name of your image – it should relate to the content).
Cropping in Photoshop
There are times when just resizing your image might not give you the results you desire – e.g. if you have a large portrait image and you want it to be landscape. In some situations you’re going to need to think about cropping a picture.
Cropping is the removal of unwanted outer areas from a photographic or illustrated image. The process usually consists of the removal of some of the peripheral areas of an image to remove extraneous trash from the picture, to improve its framing, to change the aspect ratio, or to accentuate or isolate the subject matter from its background. – Wikipedia
To crop an image in Photoshop, first get it open in the software (see the ‘Resizing in Photoshop’ guide above if you don’t know how to do this.
Select the ‘Crop’ from the toolbar on the left – it should be the fifth tool down
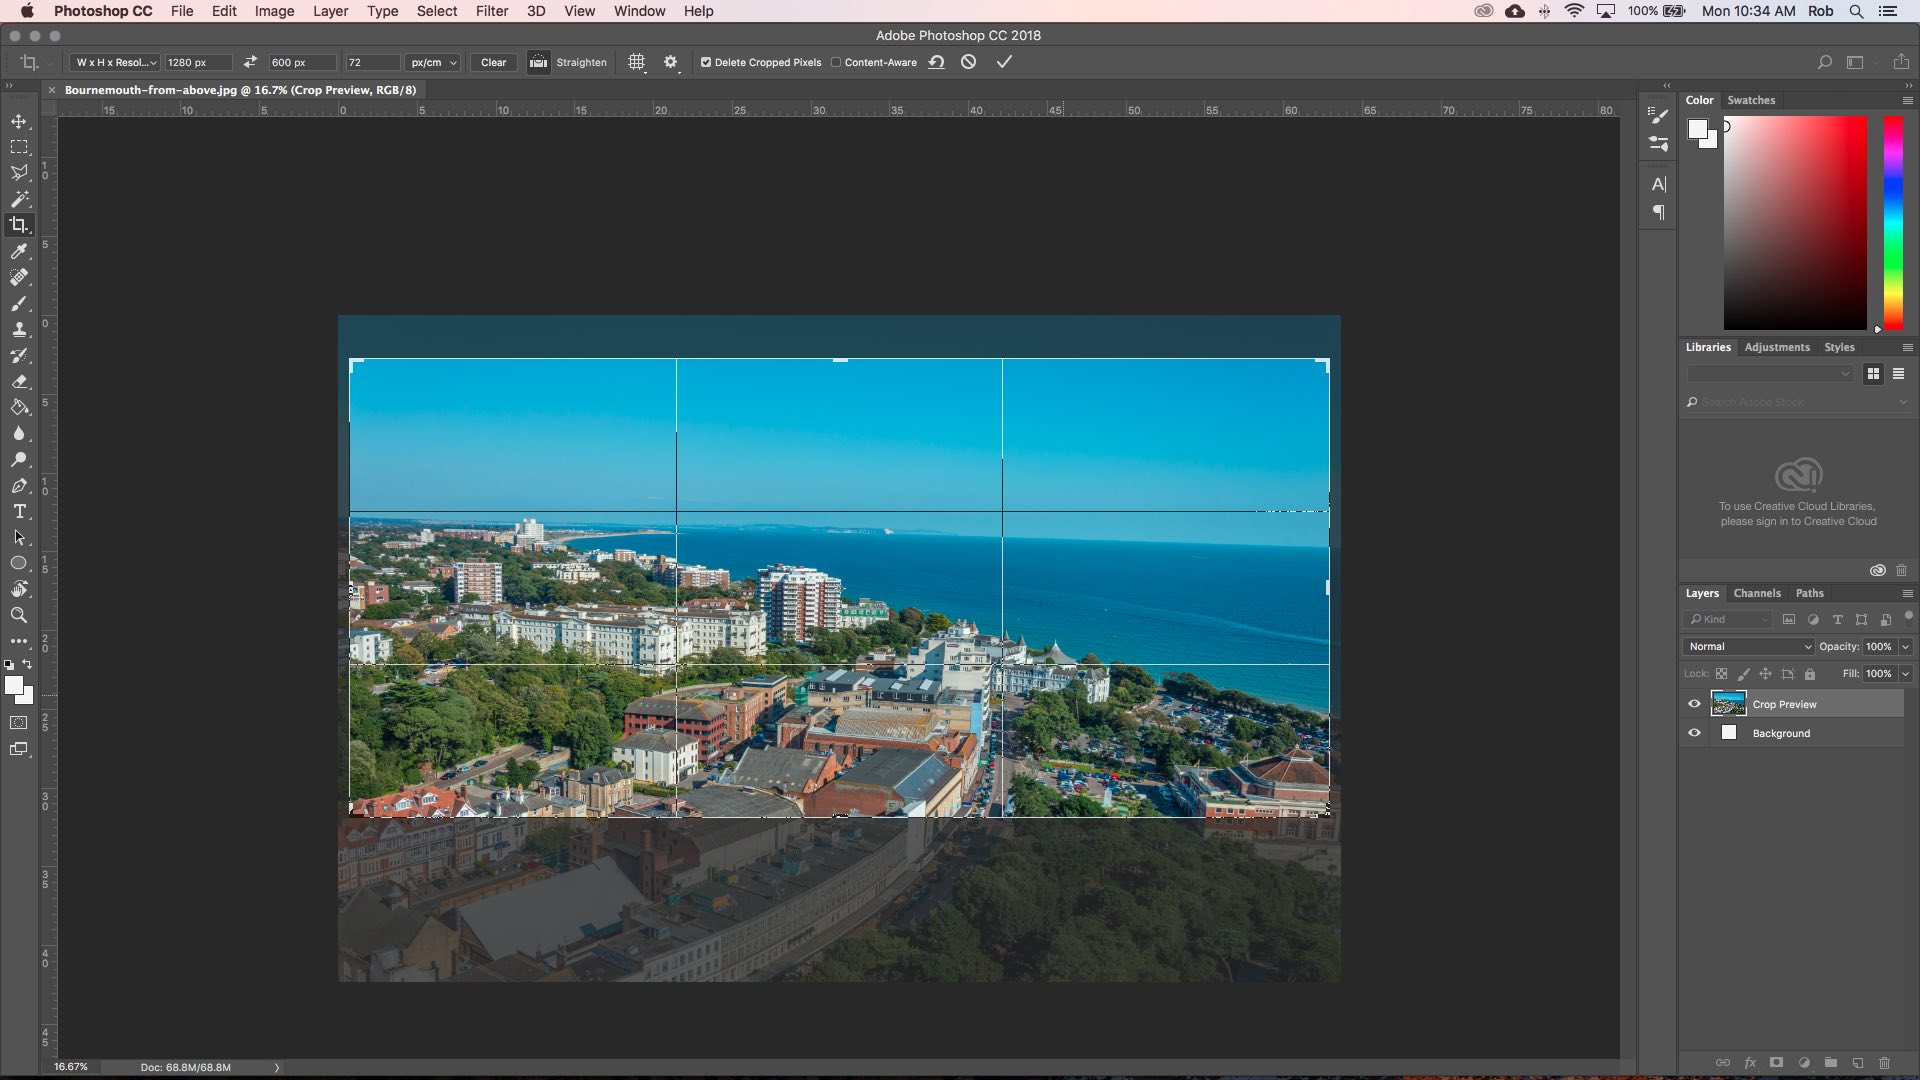
A grid should have now appeared over your image – this is the crop area, anything outside of this area will be removed.
To change the size and shape of your crop area, in the horizontal menu at the top of the screen (it has a crop icon on it) change the drop down to ‘W x H x Resolution’.
In the next two boxes enter width and height details for your crop area. If the image is large enough (and landscape), I usually crop them to w: 1920px h: 1080px. If the image isn’t large enough use a variant of this ratio e.g. w: 960px h: 540px
Finally, position your crop area accordingly and hit enter to confirm the crop
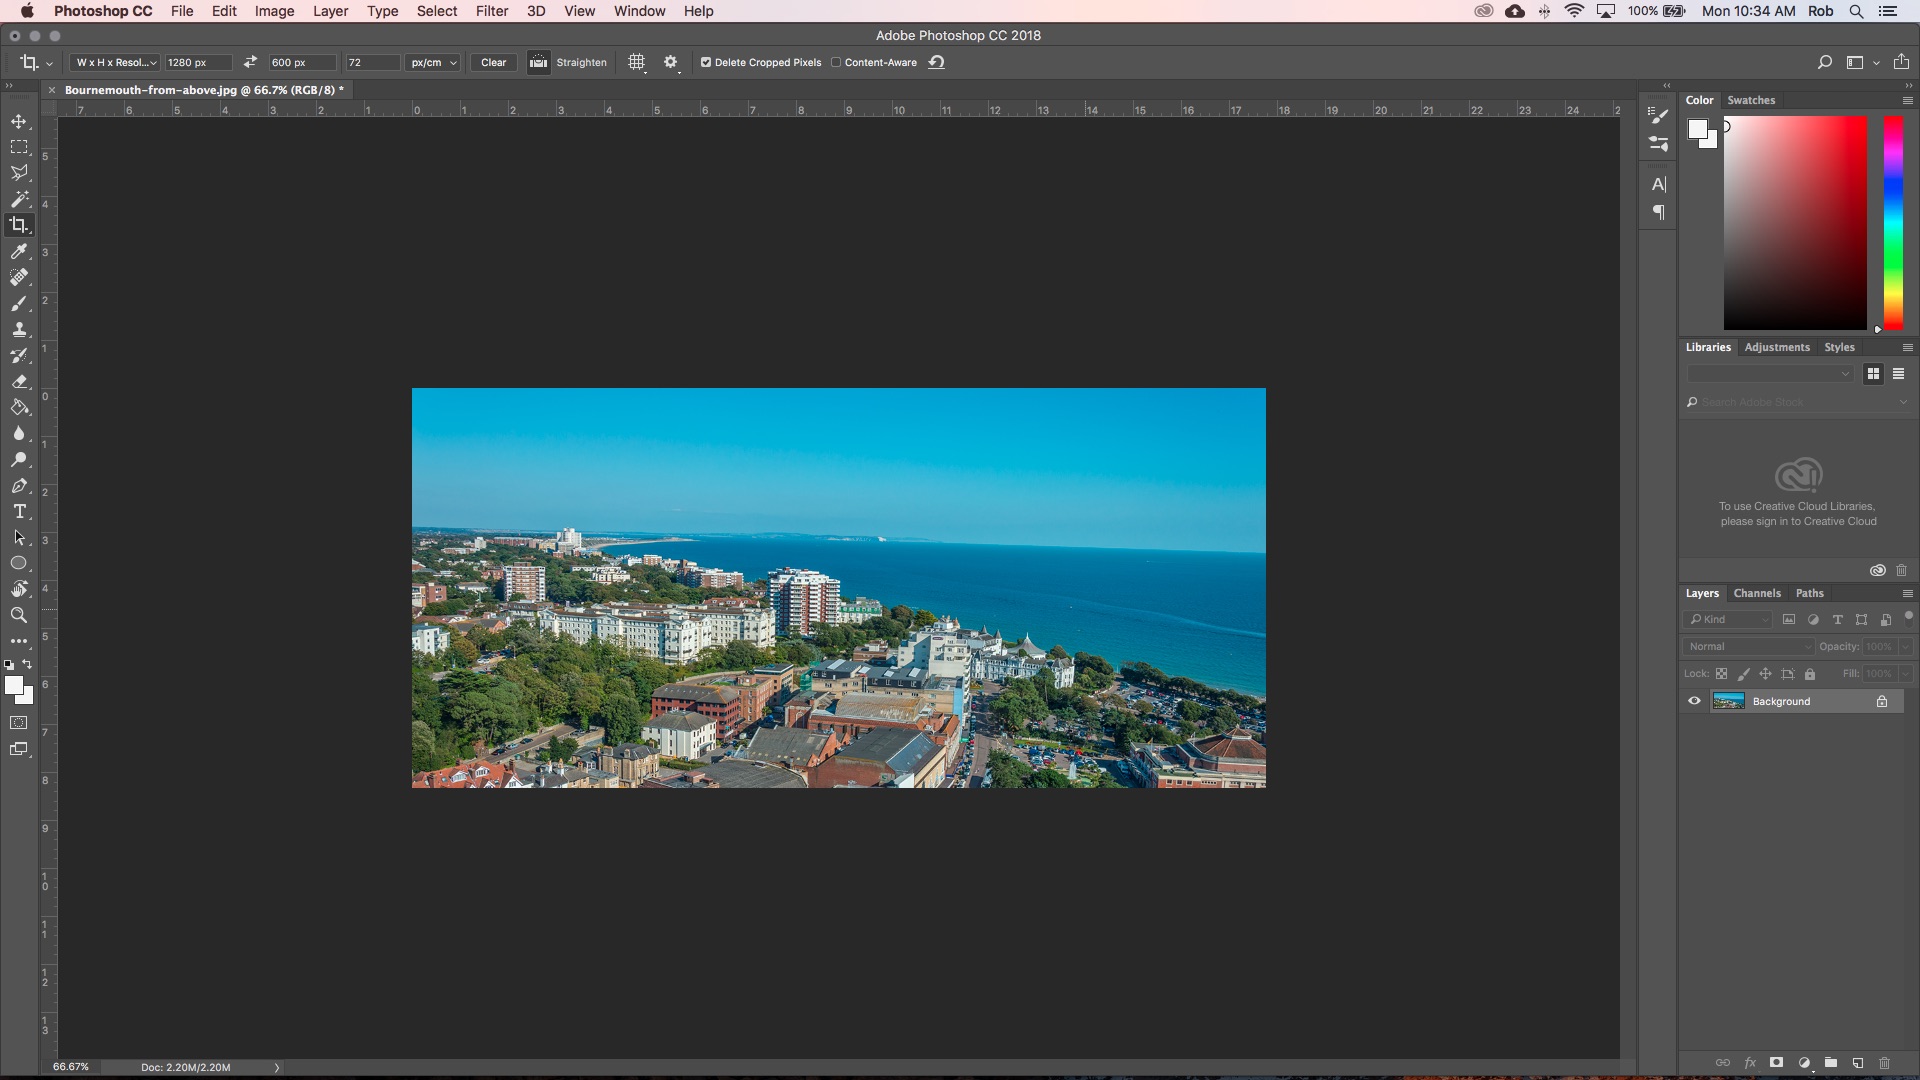
Once you’ve hit enter your crop area should disappear and your image will have been altered.
Please note: If your image looks small don’t worry to check the actual size of your image go to the ‘View’ menu and select ‘100%’.
Finally you need to save your image, follow the ‘Resizing in Photoshop’ guide to do this
Uploading Images

Place the cursor in your Post where you want to insert your image and click on the Add Media button.

In the Insert Media window click on the Upload Files tab to begin adding your own images.
to upload images you can either:
- Drag and drop files into the window
- Click on the Select Files button

If you clicked on the Select Files button, browse to and select your image file and click on the open button.

Once you file is uploaded, you need to add some basic information to the file:
- Title – The title will not display on your page anywhere, by default it will take the filename as its Title.
- Caption – Text that displays on your post underneath your image. Useful for Attribution.
- Alt Text – Used when images can’t be loaded or for viewers using screen readers. Should provide a description for the image if it can’t be loaded.
- Description – not used, leave blank
- Alignment – Select how your image displays/aligns on the page.
- Link To – Decide what (if anything) you want your image to link to.
- Size – Choose the size at which your image will be inserted into your Post.
When complete, click on the Insert into Post button.

Once your image is inserted, be sure to Save and Preview your Post
Watch the Video
A video looking at uploading and inserting images into a news post (please note: although this tutorial doesn’t feature the Breaker, the process is exactly the same)
Featured Image

The Breaker, like most WordPress sites, relies heavily on the Featured Image option and wherever you see images on the homepage, these are all defined by the Author of the Post during setup. It is the responsibility of you as the Author of the Post to source images, whether taken yourself or copyright free, for use in your articles.
- Featured images should always be Landscape
- Featured images should use a 2:1 ratio – to ensure your image doesn’t get cropped when displayed in your Post (there will be some cropping when image is displayed on Homepage and in Archives) work with a 2:1 ratio (e.g. 1200 px wide & 600 px high)
Click on the Set featured image link in the Featured Image panel to add your chosen image

In the Set featured image window that appears click on the Upload Files tab.
To upload either drag files from your finder window onto the Browser or click on the Select Files button to browse to your images.
If you’ve already uploaded an image to your Post you can select that image to use as your featured image from the Media Library tab in the Set featured image window.

If you clicked on the Select Files button, browse to and select your image file and click on the open button.

When your image has been uploaded, fill in all necessary fields – for more details see the Uploading Images guide. above
Once all fields are complete, click on the Set featured image button and the window should automatically close.

Once your image has been set, you should now be able to see a preview of it in the Featured Image panel.
Insert a Gallery

To insert a Gallery into your Post – first place your cursor in your post where you want to add your slideshow.
With your cursor in place, click on the Add Media button

In the Insert Media window, select Create Gallery from the options down the left-hand side.

To add your images, click on the Upload Files tab (if your images are already uploaded go to the Media Library tab) and either drag and drop your files onto this window or click on the Select Files button to browse to your images.

If you clicked on the Select Files button, browse to your files in the Finder window that has appeared and select all your files for your gallery – you can select multiple files by either clicking on the first file, holding the shift key and clicking the last file at the bottom of a list of files or hold the cmd key down and select multiple files.
Once you have selected all the files you want to include, click on the Open button to upload them.

Now your files are all uploaded, ensure they are selected (tick icon in top right corner of image) and click on the Create a New Gallery button.

This will take you through to the Edit Gallery page – here you should add any Captions to your images that you want to display.
Under the Gallery Settings you can alter how your gallery displays.
Click the ‘Insert Gallery’ but when done.

You should now be able to see your gallery in your Post. Be sure to Save & Preview your article to check how the gallery will actually look.